Foam Rolling Techniques Broken Down
This week on the Norwood Chiropractic blog, we are going to break down simple techniques to using a foam roller on soft tissues. Due to the amount of information, we will be making a Part 3 of this series covering “how to make your mobilizations stick”. If you haven’t read “What everyone should know about foam rolling: Part 1”, be sure to check it out here: https://norwoodchiropractic.com/blog/everyone-know-foam-rolling-part-1/
Last week, we identified three soft tissue structures to target with foam rolling or self-mobilization: muscles, tendons, and skin. We want to target these soft tissues because they are highly innervated (i.e. contain a lot of nerve endings). Because muscles, tendons, and skin are highly innervated, the pressure from foam rolling can produce a neural response in the tissues that the brain perceives as pain relief or tension release. With this mechanism in mind, the goal of our foam rolling techniques will be to provide a sufficient dose of light-moderate pressure on muscles, tendons, and skin to activate a neural response. Excessive pressure or prolonged foam rolling can create or exacerbate conditions related to irritation of nerve tracts, blood vessels, or bursae.
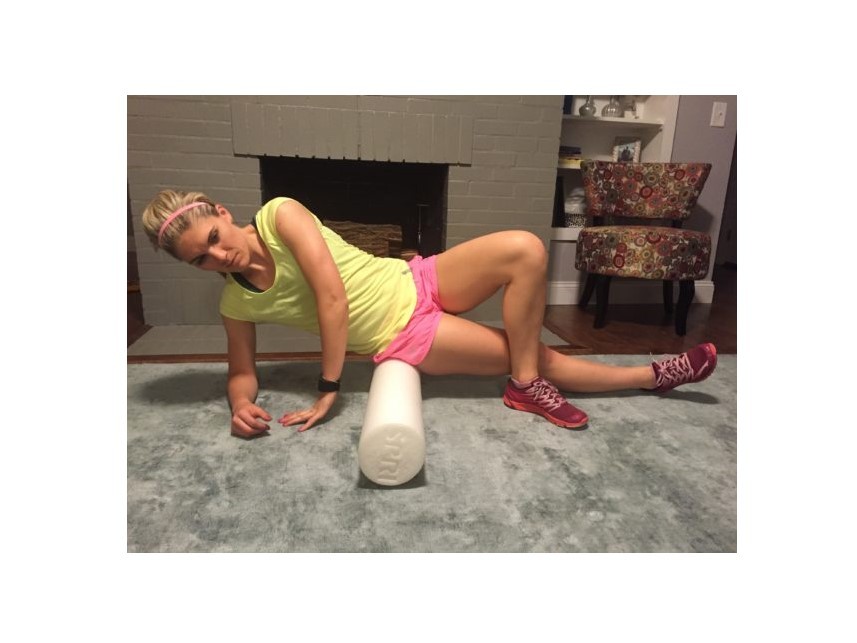
To effectively foam roll, we first have to identify the muscles and tendons to be treated. Then, apply a consistent pressure on the chosen tissues to obtain the release. Identification of the problem area may be done by using the rolling action of the foam roller. The “rolling” portion should be used more as a diagnostic tool to help find the area to be treated. Once identified, light-moderate sustained pressure can be applied to the area by remaining still and allowing your body to relax into the foam roller. In this way, the foam roller is providing static pressure on a specifically chosen area. An example demonstrating rolling of the glutes can be seen in the following image. Notice how she maintains two solid contacts with the ground (right forearm, left foot) to modulate how much pressure is applied to the back of the right hip.
The previous explanation and example demonstrate a passive technique to rolling. However, this can be made active by lengthening or shortening the muscles contacting the foam roller. By adding this step to the same technique, foam rolling can be made more effective by stimulating a muscle while producing the motion in need of improvement. The following set of images provides an example of active motion during foam rolling of the quadriceps. Note that she maintains engagement of the abdominal core musculature and does not allow the low back to arch out of a neutral position.


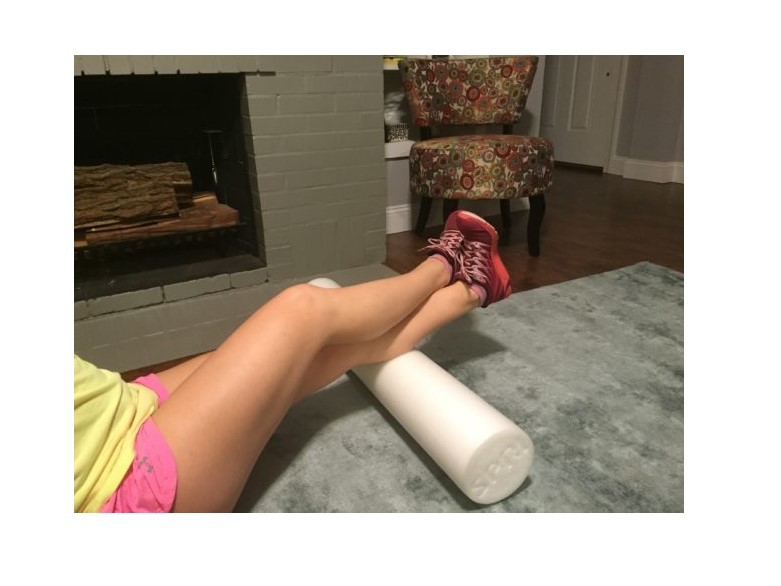
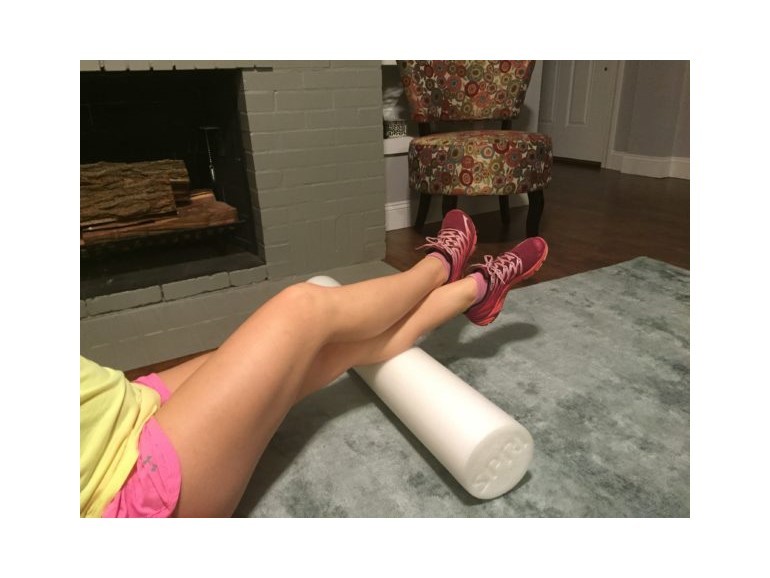
The following set of images provides an example of active motion during foam rolling of the calf musculature. She is attempting to improve dorsiflexion of the ankle while stimulating the release of the gastrocnemius. She also added appropriate intensity to the activity by crossing the right leg over to produce an adequate amount of pressure on the treated leg.
Being specific and adding active movement to foam rolling can greatly improve effectiveness and efficiency of the activity. Therein, providing you with all of the benefits, while allowing more time to do what you want to do. Be sure to tune back in with your favorite Cincinnati chiropractors next week for more great health-related tips and information.


